What is Dental Floss Threader?
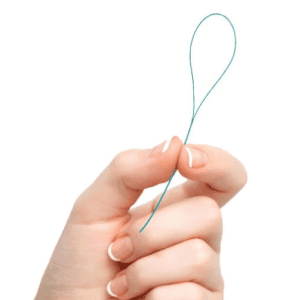
A floss threader is a small, flexible tool designed to assist people with specific dental needs in threading dental floss or other dental aids through tight spaces, such as between braces, dental bridges, and under orthodontic wires. It is a valuable accessory for individuals with orthodontic appliances or dental work that makes traditional flossing challenging.
Key features and uses of a floss threader include:
- Flexible Plastic Design: Floss threaders are typically made from soft and flexible plastic. They have a sturdy but pliable structure that allows them to navigate tight spaces in the mouth.
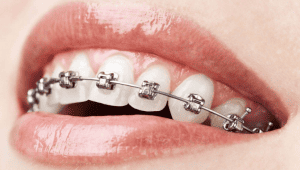
- Orthodontic Braces: Floss threaders are commonly used by individuals with braces. They help guide dental floss between wires and brackets, making it easier to clean around these orthodontic appliances.

- Dental Bridges: Floss threaders are also useful for those with dental bridges. They aid in passing floss under the bridge to clean the space between the artificial tooth and the natural teeth.

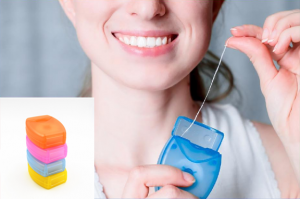
- Ease of Use: Using a floss threader is straightforward. You simply thread a length of dental floss or a specialized orthodontic floss through the loop or eye of the threader. Then, you can insert the threader under the orthodontic wire, between teeth, or through dental work. After threading the floss, you can proceed to floss your teeth as usual.
- Disposable and Reusable Options: Floss threaders are available in both disposable and reusable forms. Disposable threaders are discarded after a single use, while reusable ones can be cleaned and used multiple times.
- Enhanced Dental Hygiene: Floss threaders contribute to better oral hygiene for individuals with braces, bridges, or other dental appliances. They help reach areas that might be otherwise challenging to clean effectively.
- Variety: Floss threaders come in various designs and sizes, making it possible to find one that best suits your specific needs and preferences.

How Do You Use a Floss Threader?
Using a floss threader is a simple process, and it’s especially helpful for individuals with braces, dental bridges, or other dental work that makes threading traditional dental floss difficult. Surely you have to choose the fitable dental floss type to threader due to your teeth situation. Here’s a step-by-step guide on how to use a floss threader:
Materials You’ll Need:
- Dental floss
- Floss threader
Steps:
1. Prepare Your Dental Floss:
Cut a piece of dental floss to your desired length. For most people, an 18- to 24-inch (45-60 cm) length of dental floss is adequate. If you’re using specialized orthodontic floss, follow the dental floss manufacturer‘s recommendations.
2. Thread the Dental Floss:
Take one end of the dental floss and thread it through the loop or eye of the floss threader. Ensure that there is a sufficient length of floss threaded through the loop.
3. Position the Floss Threader:
Hold the floss threader between your thumb and forefinger, leaving the dental floss extended out from the loop. The floss threader should resemble a large needle with the dental floss acting as the “thread.”
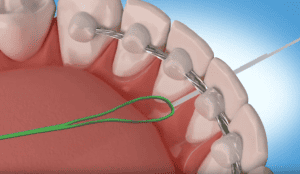
4. Insert the Floss Threader:
Carefully insert the pointed end of the floss threader under the dental appliance (e.g., braces wire, dental bridge) or between your teeth where you want to floss. For braces, you may need to guide it between the wires and brackets. For dental bridges, slide it under the artificial tooth and between the natural teeth.
5. Thread the Dental Floss:
Once the floss threader is in the desired position, use it to guide the threaded dental floss through the tight space. Pull the dental floss through until you have a sufficient length to hold onto for flossing.
6. Floss Your Teeth:
With the dental floss now threaded through the tight space, you can proceed to floss your teeth as you normally would. Gently slide the floss up and down between your teeth and along the gumline to remove plaque and debris.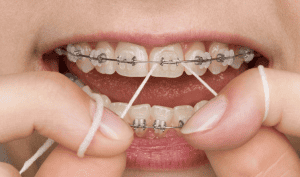
7. Repeat as Needed:
Move to the next area you want to floss, and if necessary, rethread the dental floss using the floss threader. Continue flossing until you’ve cleaned between all the desired teeth or dental appliances.
8. Dispose or Clean the Floss Threader:
Depending on the type of floss threader you have (disposable or reusable), either discard it if it’s a single-use variety or clean it thoroughly if it’s reusable.
Should Floss Threaders Be Reused?
Whether or not floss threaders should be reused depends on the type of floss threader you have. There are disposable floss threaders and reusable floss threaders, and the appropriate approach for each type differs:
Disposable Floss Threaders: Disposable floss threaders are designed for single use, and it is generally recommended not to reuse them. After each flossing session, dispose of the threader. Using a disposable floss threader only once helps maintain proper hygiene and minimizes the risk of transferring bacteria or debris from one area of your mouth to another.
Reusable Floss Threaders: Some floss threaders are designed to be reusable. These are typically made from more durable materials and can withstand cleaning. If you have a reusable floss threader, you can clean and reuse it multiple times. Here’s how to do it:
- After flossing, remove the dental floss from the threader.
- Wash the floss threader with warm, soapy water to remove any plaque or debris.
- Rinse it thoroughly to ensure it’s clean and free from soap residue.
- Allow the threader to air dry or pat it dry with a clean towel.
- Store the cleaned and dried floss threader in a clean, dry place for your next use.
Remember to floss gently and avoid snapping the dental floss, as this can be rough on your gums. Regular flossing using a floss threader can help maintain good oral hygiene, even if you have dental work that makes flossing challenging.